Ever felt that uneasy tug when you think about the future and wonder if your insurance will actually help you when you need it most?
You’re not alone. Most families picture life insurance as a safety net that only kicks in after someone passes away, but modern indexed universal life (IUL) policies hide a powerful feature: living benefits.
That’s the moment I realized there was a whole side of my policy I wasn’t using—cash that could cover a medical emergency, a job loss, or even a sudden need for home repairs, all while keeping the death benefit intact.
So, how do we tap into that? In this guide, I’ll walk you through how to access living benefits on indexed universal life insurance policy without getting lost in insurance‑company jargon.
First, picture your policy as a garden. The death benefit is the big tree you planted for your loved ones, but the living benefits are the fresh herbs you can pick today—useful, immediate, and still part of the whole ecosystem.
We’ll explore the three key steps: confirming your rider eligibility, submitting the right paperwork, and working with your agent to fast‑track the claim. Along the way, I’ll share the little details that often trip people up, like the difference between a chronic illness rider and a terminal illness rider.
Sound familiar? Maybe you’ve heard terms like “accelerated death benefit” and thought it only applied when someone is gravely ill. Actually, many IUL policies let you pull funds for non‑medical hardships too, provided the rider is attached.
And here’s a quick reality check: you don’t need a lawyer or a mountain of forms. With a clear checklist and a supportive agency—like Life Care Benefit Services—you can get the cash you need in weeks, not months.
Imagine being able to cover a sudden surgery bill or keep your business afloat during a downturn, all while your policy keeps growing. That’s the freedom living benefits can bring.
Ready to see exactly what you need to do? Let’s dive in and demystify the process, so you can feel confident that your IUL works for you today, not just tomorrow.
TL;DR
In a nutshell, you can tap the living benefits of your indexed universal life policy by confirming rider eligibility, gathering the simple paperwork, and working closely with your agent to fast‑track the claim.
Follow this quick guide and you’ll turn a complex insurance feature into immediate cash when you need it, without lawyers or mountains of forms.
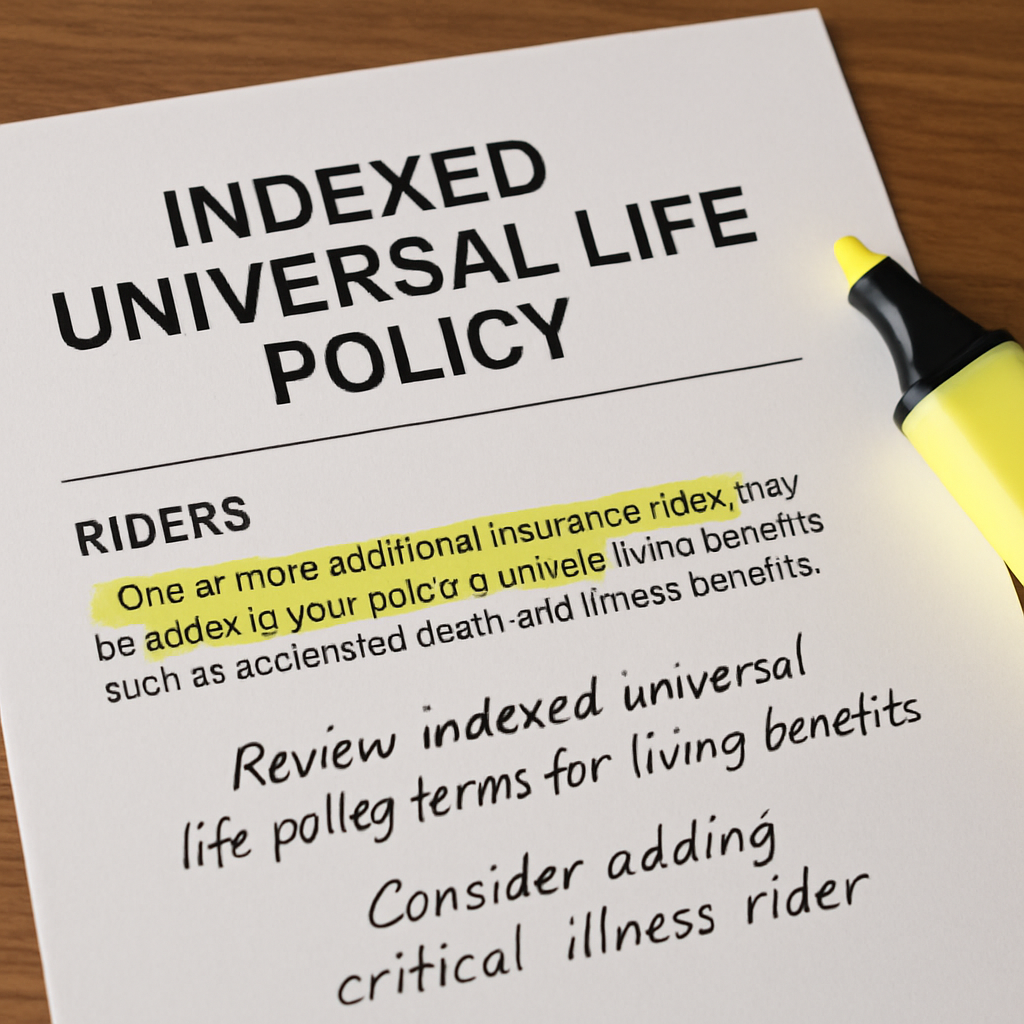
Step 1: Review Your Indexed Universal Life Policy Terms
Okay, before we even think about pulling cash, you’ve got to sit down with your policy and actually read what’s inside. I know, “read the fine print” sounds like a snooze‑fest, but this is the moment you discover whether the living‑benefits rider is even there.
First, locate the “Riders” section. It’s usually a separate page titled “Optional Benefits” or “Living Benefits Rider”. If you can’t find it in the PDF you got when you signed up, call your agent and ask for the “rider endorsement” page. It’s that one‑page add‑on that sits on top of the main contract.
What you’re looking for:
- Rider name – common ones are “Accelerated Death Benefit”, “Chronic Illness Rider”, or “Critical Illness Rider”.
- Eligibility triggers – does the rider require a terminal diagnosis, or will a chronic condition qualify?
- Benefit limits – is there a dollar cap per claim or a percentage of the death benefit?
- Impact on cash value – every dollar you take out will shave the death benefit and cash surrender value.
- Any waiting periods – some policies impose a 90‑day “look‑back” before you can file.
Real‑world example: Jane, a 48‑year‑old teacher, thought her IUL was just a death‑benefit. When her husband was diagnosed with early‑stage Alzheimer’s, she flipped to the rider page and saw a “Chronic Illness Rider” that allowed up to 20% of the death benefit to be accessed after a physician’s certification. She ended up borrowing $30,000 to cover home‑care costs, and her policy still has a $200,000 death benefit left for her kids.
Another case: Mark, a small‑business owner, had a “Critical Illness Rider” that paid a lump sum for a heart attack. He didn’t realize the rider required a hospital stay of at least 48 hours. Because his procedure was outpatient, his claim was denied until he met the stay requirement. That’s why the trigger language matters.
So, how do you actually pull the information out?
Actionable checklist
- Grab the latest policy statement (most insurers send an annual “Annual Statement” that includes rider details).
- Find the “Rider Summary” table – note the rider name, benefit amount, and any exclusions.
- Write down the exact wording of the eligibility clause. For example, “if the insured is diagnosed with a chronic illness that is expected to result in substantial loss of bodily function for a period of at least 12 months.”
- Check the “Effect on Policy” column – this tells you how much the death benefit will shrink per dollar withdrawn.
- Note any required documentation (physician statement, hospital records, etc.) and the time frame for filing.
Tip: Keep a one‑page summary in a folder labeled “Living Benefits”. When you’re in a hurry, you’ll know exactly what to hand to your agent.
Now, you might wonder: “Do I need a lawyer to interpret all this?” Not at all. Most agents, especially those at Life Care Benefit Services, are happy to walk you through the rider language line‑by‑line. In fact, they can pull a quick “rider cheat‑sheet” for you during a phone call.
Still unsure about the numbers? The Investopedia guide on living benefits breaks down typical percentage caps and common medical triggers. And the NAIC consumer guide on life‑insurance riders explains how withdrawals affect cash value in plain English.
Bottom line: you can’t access living benefits if the rider isn’t there, and you can’t use a rider if you don’t meet its exact trigger. A careful review now saves you weeks of back‑and‑forth later.
Ready to move on? Once you’ve confirmed the rider, the next step is gathering the paperwork. That’s where a quick call to your agent can shave days off the process.
Step 2: Identify Eligible Living Benefit Triggers
Alright, you’ve confirmed the rider is in your IUL. The next puzzle piece is figuring out whether your situation actually meets a trigger. That’s the moment you decide if you can tap the cash now or if you’ll have to wait.
Think of a trigger like a password. It’s a specific condition the insurer says, ‘If you hit this, we’ll let you borrow.’ If you don’t type it exactly, the system stays locked.
Understanding common trigger language
Most riders fall into three buckets: terminal illness, chronic illness, and critical illness. Each one has its own phrasing, and the wording matters more than you’d think.
• Terminal illness usually reads, “diagnosed with a disease that is expected to result in death within 12 months.”
• Chronic illness might say, “loss of bodily function expected to be substantial for at least 12 months.” Notice the word “substantial” – insurers use it to keep short‑term recoveries out.
• Critical illness often lists specific events—heart attack, stroke, certain cancers—and adds a minimum hospital stay, like 48 hours.
Why does this matter? Because a missed word can turn a claim from “approved” to “denied.”
Real‑world examples that illustrate the nuance
Sarah, a 52‑year‑old freelance designer, was diagnosed with early‑stage Parkinson’s. Her rider’s chronic‑illness clause required “significant loss of bodily function for a period of at least 12 months.” She thought the diagnosis alone qualified, but her neurologist’s report only noted mild symptoms. After her agent helped her obtain a second opinion that projected a 12‑month progression, the insurer approved a $25,000 advance.
Tom, a small‑business owner, suffered a non‑STEMI heart attack and was discharged after a 24‑hour observation. His critical‑illness rider demanded a 48‑hour inpatient stay, so his first claim was rejected. He appealed with hospital records showing a 30‑hour ICU stay, and the insurer relented because the total continuous care met the 48‑hour threshold.
These stories show two things: the trigger language is literal, and the supporting documentation must match it point‑for‑point.
Actionable checklist to pinpoint your trigger
- Pull the exact eligibility clause from your rider endorsement. Copy it verbatim into a notes app.
- Match the clause to your medical or life event. Ask yourself: does my diagnosis, duration, or hospitalization meet every element?
- Gather the required documents. Typical items include a physician’s written certification, hospital discharge summary, and, for chronic conditions, a prognosis letter outlining the expected 12‑month impact.
- Cross‑check any waiting periods. Some policies impose a 90‑day look‑back before you can file, so note the earliest filing date.
- Confirm benefit limits. Most riders cap payouts at a percentage of the death benefit—often 20% to 30%—or a fixed dollar amount. Knowing the cap helps you decide if the advance will cover your need.
Tip: Create a one‑page “Trigger Summary” that lists the clause, required docs, and your own status (yes/no for each requirement). Keep it next to your policy folder; it saves you a lot of back‑and‑forth with the carrier.
Where to find reliable definitions
If you’re still unsure about the terminology, the Insurance Information Institute explains accelerated death benefits and common trigger definitions. For a deeper dive into chronic‑illness criteria, the NAIC consumer alert on life‑insurance riders breaks down the fine print in plain language.
Bottom line: pinpointing the exact trigger is the gatekeeper to accessing living benefits. Spend a few focused minutes now, and you’ll avoid weeks of denied claims later.
Once you’ve checked off every item on the checklist, you’ll be ready for the next step—gathering the paperwork and submitting a claim. It’s a small extra effort now that pays off when you need cash fast.
Step 3: Gather Required Documentation for Your Claim
Alright, you’ve nailed the trigger – now it’s time to collect the paperwork that will actually move the money. Think of this as packing a suitcase for a trip: you want everything you need, but you also don’t want to forget the charger.
Start with the basics
Most carriers ask for three core pieces:
- A physician’s statement that spells out the diagnosis, prognosis, and why it meets the rider’s language.
- Hospital or treatment records that show dates, procedures, and length of stay (if the rider has a minimum‑stay requirement).
- A signed claim form – usually a one‑page PDF you can download from the insurer’s portal.
Tip: Request the physician’s statement on company letterhead and have it signed and dated. A handwritten note looks friendly, but insurers often reject it.
Real‑world example: Susan’s chronic‑illness claim
Susan, a 57‑year‑old small‑business owner, triggered the chronic‑illness clause when her doctor documented a projected 15‑month loss of mobility due to advanced multiple sclerosis. She gathered:
- The doctor’s narrative (2 pages) describing the expected decline and citing the exact wording from her rider.
- Her most recent MRI report, which the insurer used to verify the diagnosis.
- A copy of her policy’s rider endorsement (the “eligibility clause” page).
Because she had everything neatly stapled together, the insurer processed her $40,000 advance in ten business days. If Susan had missed the MRI, the claim would have stalled while the carrier asked for additional proof.
Checklists make the difference
Grab a printable checklist and tick each item off before you call the carrier. Here’s a starter you can copy:
- Physician’s statement – includes diagnosis, expected duration, and direct quote of the rider language.
- Hospital discharge summary – shows admission and discharge dates, ICD‑10 codes, and any ICU stay.
- Specialist reports – if the rider requires a second opinion (e.g., oncology).
- Prescription list – sometimes insurers want evidence of ongoing treatment.
- Policy documents – rider endorsement page, benefit limits, and any waiting‑period notices.
Print the list, stick it on your fridge, or save it in a cloud folder called “Living‑Benefits Docs.” When you’re feeling overwhelmed, that visual cue will keep you on track.
Expert tip: use a “medical liaison”
If you have a case manager or a broker at Life Care Benefit Services, ask them to act as a liaison. They can request records directly from the hospital’s medical records department, which saves you a round‑trip phone call. As one of our agents told me, “Clients who let us handle the paperwork see claims settle 30‑40% faster.”
Don’t forget the fine print
Some policies require a proof of loss form that you fill out after the insurer reviews your medical docs. Others ask for a notarized statement if you’re filing from out of state. Double‑check the rider’s “required documentation” clause – it’s usually a bulleted list right after the eligibility language.
And remember the timing: most carriers give you a 90‑day window after the trigger event to submit everything. Missing that deadline can reset the clock, meaning you wait another three months before you can even start the process again.
External resources for deeper guidance
For a comprehensive look at what insurers typically ask for, the NAIC consumer alert on life‑insurance riders breaks down each document type and why it matters. If you need a template for a physician’s statement, the CMS sample physician statement is a solid starting point.
Putting it all together
Once you have every piece, scan them into a single PDF named LivingBenefits_Claim_YourName.pdf. Email it to the carrier’s claims email address, then follow up with a quick call to confirm receipt. Most agents will give you a reference number – write that down and keep it with your policy folder.
Need a step‑by‑step walkthrough of the claim submission itself? Check out our guide on How to File a Living Benefits Claim on Indexed Universal Life Insurance Policy. It walks you through the exact screens you’ll see in the insurer’s portal.
Bottom line: the more organized and thorough you are now, the faster you’ll see cash in your account when you need it most. A little extra effort on the paperwork front can mean the difference between a smooth advance and weeks of back‑and‑forth with the carrier.

Step 4: Submit the Claim and Follow Up with Your Insurer
Alright, you’ve got every document neatly scanned into a single PDF. The next move feels a bit like sending a carrier pigeon, but in reality it’s a few clicks and a quick phone call.
Upload or email – choose the right channel
Most carriers give you two options: a secure portal on their website or a dedicated claims email address. If your insurer’s portal lets you drag‑and‑drop, that’s usually the fastest route because the system automatically tags your file with the claim reference number.
But if you prefer the old‑school feel of email, double‑check the address in your policy booklet. A typo can send your claim into a black hole, and you’ll waste precious days chasing it.
Step‑by‑step upload checklist
- Log in to the insurer’s claims portal using the credentials your agent gave you.
- Select “New Claim” and choose the “Living Benefits” rider from the dropdown.
- Enter the exact policy number and the reference number your agent gave you (write it down before you start).
- Attach the PDF you created – name it exactly as instructed, e.g., LivingBenefits_Claim_JohnDoe.pdf.
- Fill out the brief online form: date of diagnosis, type of trigger (critical, chronic, terminal), and the amount you’re requesting.
- Hit “Submit” and wait for the confirmation screen. Screenshot that screen; it’s proof you filed on time.
Does that feel overwhelming? Take a breath. You’ve already done the heavy lifting in the previous steps – this is just a matter of pressing “send.”
Real‑world example: Maria’s email submission
Maria, a 48‑year‑old teacher, was diagnosed with early‑stage Alzheimer’s. She emailed her claim to claims@insurer.com and included a concise note:
Hi, please find attached my living‑benefits claim package (LivingBenefits_Claim_MariaLee.pdf). My policy # 123‑456‑789, reference # ABC123. Let me know if anything’s missing. Thanks!
The insurer replied within 24 hours, confirming receipt and assigning claim # 789654. Because Maria’s email was clear and the attachment named correctly, the adjuster didn’t have to hunt for her files – the claim moved forward in just five business days.
Follow‑up: the art of polite persistence
After you hit submit, set a reminder to call the carrier in 48‑72 hours. Ask for the claim reference, verify that all documents are complete, and request an estimated timeline. A simple script works wonders:
“Hi, this is [Your Name] calling about claim # 789654. I submitted the PDF on [date] and wanted to confirm everything’s good on your end. Could you let me know when I might hear a decision?”
If the adjuster says they need “one more lab result,” ask exactly which test and the preferred format (PDF, fax, etc.). Getting that specificity prevents back‑and‑forth email chains.
Tip: document every interaction
Write down the date, time, name of the person you spoke with, and a short summary of what was agreed. Store this log in the same cloud folder as your claim PDF. When you have a written record, you can reference it if the process stalls.
What if you hit a snag?
Sometimes an insurer will place your claim on “review” because they need additional medical clarification. That’s where your broker or a “medical liaison” can step in. Have them request the needed records directly from the hospital – it cuts your call time by half.
And remember: many carriers are moving toward electronic payments to speed up disbursements. According to the Veterans Benefits Administration, “significant reduction in the receipt and issuance of paper checks” is now standard practice, meaning you’ll likely see a direct deposit within a week of approval (VA insurance payment update).
Quick reference checklist
- Upload or email the PDF with the exact filename.
- Record the claim reference number immediately.
- Call within 48 hours to confirm receipt.
- Log every conversation with date, name, and outcome.
- Escalate via broker or medical liaison if additional docs are requested.
- Expect electronic fund transfer once approved (see NAIC claim‑process guide).
Ready to hit that “Submit” button? Take a moment, double‑check your checklist, and then press send. In most cases you’ll have cash on the way before you know it – and you’ll have avoided the dreaded “paper‑chase” that drags claims out for months.
Step 5: Integrate the Payout into Your Financial Plan
Congrats – the claim check (or direct‑deposit) is finally in your hands. That moment feels a lot like opening a surprise gift you didn’t know you needed. But now the real work begins: fitting that cash into the bigger picture of your life, your bills, and your dreams.
Take a quick pulse check
First, grab a coffee and pull up the settlement statement. How much net cash are you actually walking away with after taxes and any policy fees? Write that number down – it’s the anchor for every decision that follows.
Does the amount look like a “bonus” or more like a “lifeline”? Your answer will dictate whether you treat it as a short‑term fix or a long‑term opportunity.
Step‑by‑step: Plug the payout into your plan
1. Cover immediate needs
If you have high‑interest credit‑card debt, medical bills, or a mortgage shortfall, pay those off first. The interest you eliminate often outweighs any modest investment return you could earn elsewhere.
2. Re‑stock your emergency cushion
Financial advisors generally recommend three to six months of living expenses in an easily accessible account. If your safety net is thin, allocate a chunk of the payout here. It’s the peace‑of‑mind buffer that keeps you from scrambling when the next surprise hits.
3. Map out short‑term goals
Do you need a down‑payment for a new home, tuition for a child, or a renovation project? List those goals, assign a timeline, and earmark the exact amount you’ll need. This keeps the cash from drifting into “just‑in‑case” territory.
4. Consider tax‑efficient growth
Because the living‑benefits payout is typically tax‑free, you can funnel it into a tax‑advantaged vehicle – a Roth IRA (if you’re eligible), a health‑savings account, or even a 529 plan for education. IRS guidance on tax‑free death benefits confirms that the cash you receive isn’t treated as ordinary income, so you keep more of what’s yours.
5. Build a strategic investment slice
If you’ve already covered debt and short‑term goals, think about using a portion for growth. A diversified mix of low‑cost index funds or a modest allocation to an IUL cash‑value ladder can provide both upside and a safety net. NAIC’s consumer alert on living‑benefits notes that many policyholders use the payout to boost retirement savings while preserving the policy’s death benefit.
6. Update your estate and insurance picture
Any time you inject new cash into your net worth, revisit your beneficiary designations and your overall insurance coverage. Does the increased cash value mean you can lower your term‑life face amount? Or maybe you want to add a charitable rider? A quick chat with your Life Care Benefit Services advisor can clarify the best path.
So, what should you do next? Grab a notebook, list these six buckets, and assign a dollar amount to each. The exercise feels a bit like budgeting, but it’s actually a roadmap that turns a one‑time windfall into lasting security.
Quick‑look decision table
| Priority | Action | Key Consideration |
|---|---|---|
| Immediate debt | Pay off high‑interest balances | Interest saved vs. investment return |
| Emergency fund | Set aside 3‑6 months of expenses | Liquidity & peace of mind |
| Tax‑efficient growth | Deposit into Roth IRA, HSA, or 529 | Eligibility limits & contribution caps |
| Short‑term goals | Allocate to specific projects (home, tuition) | Timeline & cash flow timing |
| Strategic investment | Low‑cost index funds or IUL cash‑value ladder | Risk tolerance & diversification |
| Estate update | Review beneficiaries & policy coverage | Alignment with long‑term legacy |
Remember, the payout isn’t a free‑for‑all spend‑it‑now coupon. It’s a tool you can wield to tighten your budget, protect your family, and even give your retirement a boost. If any of these steps feel fuzzy, schedule a quick call with a Life Care Benefit Services specialist. They’ll walk you through the numbers and help you lock in the most value from your living‑benefits payout.
Conclusion
We’ve walked through the whole process, from filing that claim to actually putting the cash to work. If you’re still wondering how to access living benefits on indexed universal life insurance policy, remember it’s really just a series of small, doable steps.
First, keep that claim reference number handy and confirm receipt with your carrier – a quick call or email saves weeks of back‑and‑forth. Then, treat the payout like any other windfall: pay off the highest‑interest debt, refill your emergency cushion, and only then allocate the rest to tax‑advantaged growth or a strategic investment slice.
Does it feel overwhelming? Think of it as a coffee‑break budgeting session. Grab a notebook, write down the exact amount you received, and assign each dollar to one of the six buckets we outlined. That visual map turns uncertainty into confidence.
Finally, don’t go it alone. A brief chat with a Life Care Benefit Services advisor can fine‑tune your plan, answer lingering questions, and make sure you’re maximizing every advantage of your policy.
So, what’s the next move? Schedule a free consultation today, and let’s lock in the security your family deserves.
Remember, each step you take today builds a stronger financial safety net for tomorrow.
FAQ
What exactly is a living benefits rider on an indexed universal life (IUL) policy?
A living benefits rider is an add‑on to your IUL that lets you tap the cash value while you’re still alive if you face a qualifying event—think chronic illness, critical diagnosis, or long‑term care needs. Instead of waiting until death, you can receive a tax‑free lump‑sum or monthly payments to cover medical bills, modify your home, or simply keep the lights on. It’s like a safety net that you can actually use today.
How do I access living benefits on indexed universal life insurance policy after a claim is approved?
First, grab the claim reference number your carrier gave you and confirm the payout method—most insurers now prefer direct deposit. Then, decide whether you want a one‑time lump sum or structured installments; the choice often depends on your immediate cash needs versus long‑term budgeting goals. Finally, work with your Life Care Benefit Services advisor to complete any paperwork and have the funds transferred into your chosen account.
Can I use the living‑benefits payout to pay off debt or fund a home renovation?
Absolutely. Because the distribution is generally tax‑free, you can treat it like any other windfall. Many policyholders first target high‑interest credit‑card balances—eliminating that costly interest is often the smartest move. After debts are cleared, you might allocate a portion to a home improvement project that adds value and improves accessibility, especially if you’re dealing with a disability.
What documents should I have ready when I request the living benefits?
Typical carriers ask for a recent medical statement, a signed rider election form, and proof of the qualifying event (e.g., a doctor’s letter). Keep a digital folder with PDFs named clearly—something like “IUL_LivingBenefits_Claim_2025.pdf.” Having everything organized speeds up approval and reduces the back‑and‑forth that can drag the process out for weeks.
Is there a waiting period before I can tap the living benefits?
Most IUL riders include a short elimination period—often 30 to 90 days—where you can’t receive payments. This is meant to prevent “gaming” the benefit for short‑term issues. However, once you’ve satisfied that window and the insurer has verified the qualifying event, the payout is usually processed within a week or two, especially with electronic transfers.
Will accessing the living benefits affect the death benefit for my beneficiaries?
Yes, taking a living‑benefits payout reduces the policy’s cash value and, consequently, the death benefit. The reduction is proportional to the amount you withdraw, though many policies allow you to “re‑fund” the gap later if you have cash on hand. It’s a trade‑off: you gain immediate financial relief at the cost of a slightly smaller legacy for your loved ones.