Imagine you’re the director of a nonprofit that just landed a grant, but the moment you think about employee benefits, a knot forms in your stomach.
You want to protect the staff who live and breathe your mission, yet the word “group health insurance” feels like a maze designed for big corporations.
But here’s the thing: nonprofits actually qualify for the same cost‑saving options as small businesses, and sometimes even better rates thanks to tax‑exempt status.
So, what’s stopping you? Often it’s just a lack of clear guidance and the fear of paperwork overload.
Let’s break it down together. First, we’ll look at why group coverage matters for mission‑driven teams – it boosts morale, reduces turnover, and signals that you value the people behind the cause.
Second, we’ll uncover the specific plan types that fit nonprofit budgets – from fully insured PPOs to self‑funded options that let you tailor contributions.
And if you’re wondering about eligibility, the good news is that the same enrollment windows that apply to small businesses also cover 501(c)(3) organizations, so you don’t have to wait for a special nonprofit calendar.
Here’s a quick reality check: many nonprofits report that offering health benefits cuts staff turnover by up to 30 % and makes fundraising pitches more compelling because donors see a well‑cared‑for team.
If you’re ready to start, a great first step is to compare what different carriers offer for groups of your size. Our guide on Navigating Group Health Insurance for Small Business Owners walks you through the key questions to ask and the numbers to watch.
Take a breath, grab a coffee, and sketch out a simple spreadsheet: employee count, desired coverage level, and budget ceiling. When you line those up, you’ll see that affordable options aren’t a myth – they’re just a few clicks away today.
TL;DR
Group health insurance for nonprofits lets mission‑driven teams access affordable, high‑quality coverage that boosts morale, cuts turnover, and strengthens donor confidence.
Start by comparing carrier plans, tallying employee count and budget, then choose a tailored option that protects your staff without breaking the nonprofit’s budget today for impact and results.
Step 1: Assess Your Nonprofit’s Healthcare Needs
First thing’s first – take a breath and picture your team in the hallway. Who’s juggling two part‑time gigs? Who just welcomed a new baby? Those little details are the compass for any benefit strategy.
Grab a spreadsheet, or even a sticky‑note board, and list every W‑2 employee. Note their age range, family status, and whether they already have a plan through a spouse. You’ll be surprised how quickly patterns emerge.
What’s the current health‑care picture?
Ask yourself: are most folks relying on ACA marketplace plans? Do a few already have employer‑sponsored coverage from a partner organization? Write down any existing premiums you’re already paying.
Next, pull the latest premium benchmarks. In 2024 the average annual cost for self‑only group coverage was roughly $9,000, and $25,500 for families – numbers that can feel daunting for a lean budget according to PeopleKeep’s 2025 nonprofit health‑benefits report. Seeing those figures side by side with your payroll helps you gauge what’s realistic.
Set a budget that feels doable
Now, decide how much you’re comfortable allocating each month. A good rule of thumb is to aim for no more than 5–7 % of total payroll on health benefits. If your payroll is $200,000, that translates to $10,000–$14,000 a year.
But remember: you don’t have to cover 100 % of premiums. Many nonprofits opt for a cost‑share model where the organization pays a base amount and employees cover the rest. That keeps the budget in check while still offering a meaningful perk.
Identify the biggest pain points
Survey your staff anonymously. A quick Google Form asking, “What health‑care challenge keeps you up at night?” often surfaces the most pressing needs – whether it’s high deductibles, lack of mental‑health coverage, or difficulty finding a plan that fits a single parent’s budget.
Take note of recurring themes. If mental‑health support pops up, you might prioritize a plan with robust therapy benefits or a supplemental stipend.
Explore flexible alternatives
Traditional group health insurance isn’t the only path. Health Reimbursement Arrangements (HRAs) like QSEHRA or ICHRA let you set a fixed monthly allowance that employees can use tax‑free for individual plans. This approach gives you budget certainty while letting staff pick the coverage that fits their life.
Think about whether a pure HRA, a hybrid HRA‑plus‑group plan, or even a simple health stipend aligns with the demographics you uncovered earlier.
And here’s a quick visual to keep the process straight:
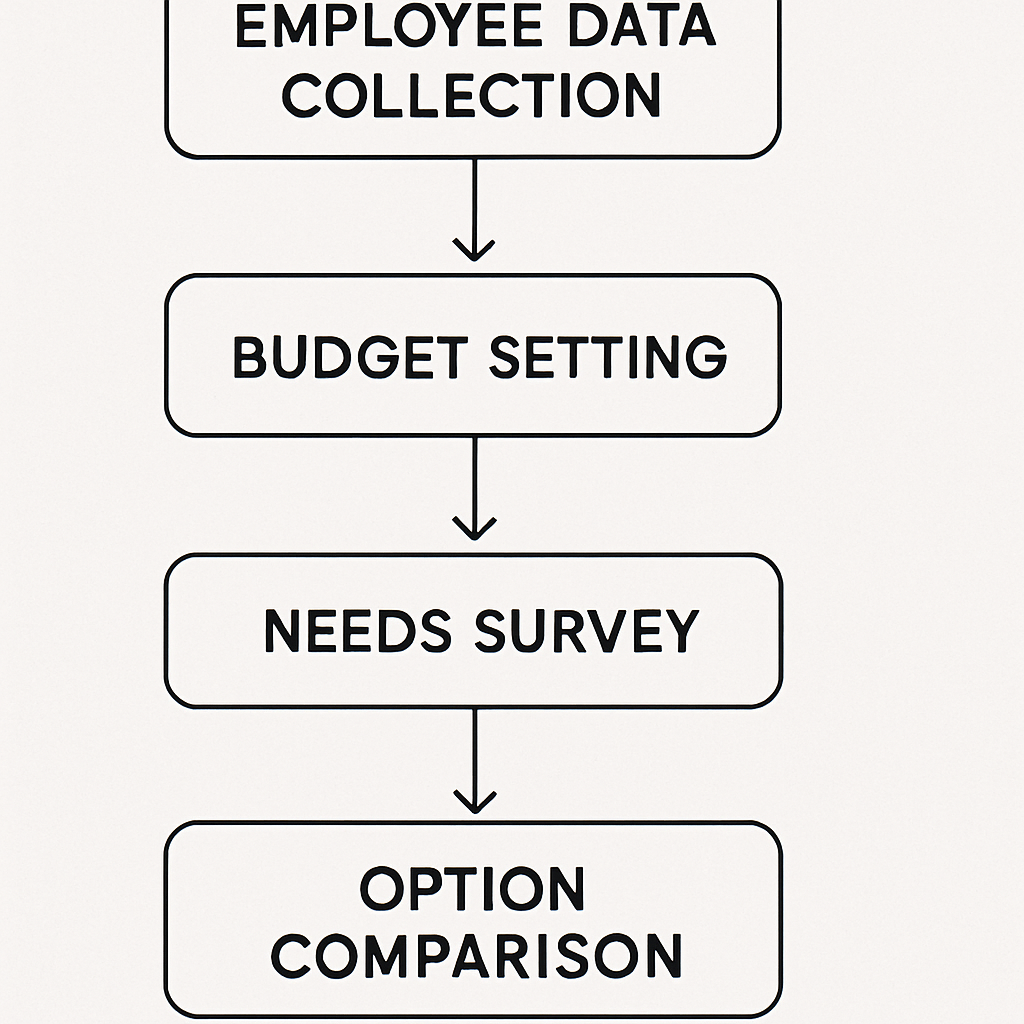
Once you’ve gathered the data, you’ll have a clear picture of three things: how many people need coverage, how much you can realistically spend, and which benefit model solves the biggest pain points.
So, what’s next? Take that spreadsheet and plug the numbers into a quick cost‑benefit matrix. List each option – traditional group plan, QSEHRA, ICHRA, health stipend – and score them on cost, flexibility, and employee satisfaction. The highest‑scoring option becomes your starting point.
And remember, this isn’t a one‑time exercise. Revisit your assessment every 12 months or whenever you add a new team member. The health‑care landscape shifts fast, and a tiny tweak now can save you thousands later.
Ready to turn those numbers into a plan that actually works for your mission? Start with the spreadsheet, set your budget, and let the data guide you to the right benefit solution.
Step 2: Research Qualified Group Health Plans
Now that you’ve got the numbers in front of you, the next move is to see what kind of group health insurance for nonprofits actually exists. It’s easy to feel lost in a sea of jargon, but remember: you’re looking for a plan that fits your budget, meets legal requirements, and actually makes sense for the people you care about.
Start with the marketplace basics
Head over to the Health Insurance Marketplace’s small‑business section. There you’ll find a clear definition of Health Reimbursement Arrangements (HRAs) – employer‑funded plans that let you reimburse qualified medical expenses tax‑free. The key point is that unused funds can roll over year to year, giving you budget predictability according to Healthcare.gov. If an HRA looks like a good fit, note the contribution limits and the documentation you’ll need to keep.
Scope out the most common plan types
For most small nonprofits, four options dominate the conversation:
- Fully‑insured group plans – the classic “buy a plan from an insurer” model.
- Level‑funded plans – you pay a base premium plus a claims fund that can earn you a rebate if claims are low.
- Health Stipends – a cash allowance that employees can use toward any health expense.
- Individual Coverage HRAs (ICHRA) – a pre‑tax allowance that reimburses employees for the premiums they buy on the individual market.
Each has its own pros and cons, and the right choice depends on your staff size, turnover, and how much flexibility you want to give them.
Zoom in on ICHRA for nonprofits
StretchDollar points out that ICHRAs are gaining traction because they let the organization set a fixed budget while employees pick the plan that works for their family as explained by StretchDollar. For a nonprofit with under 25 employees, this can feel like a win‑win: you control costs, and staff get the freedom to choose a plan that matches their unique situation.
To evaluate an ICHRA, ask yourself three quick questions:
- What is the maximum monthly allowance you can comfortably fund?
- Do your employees already have access to affordable individual plans on the ACA marketplace?
- Can your payroll system handle the monthly reimbursements without adding administrative headache?
If the answers line up, pull a sample ICHRA calculator (many brokers offer free templates) and run a side‑by‑side comparison with a fully‑insured quote.
Gather quotes and compare side‑by‑side
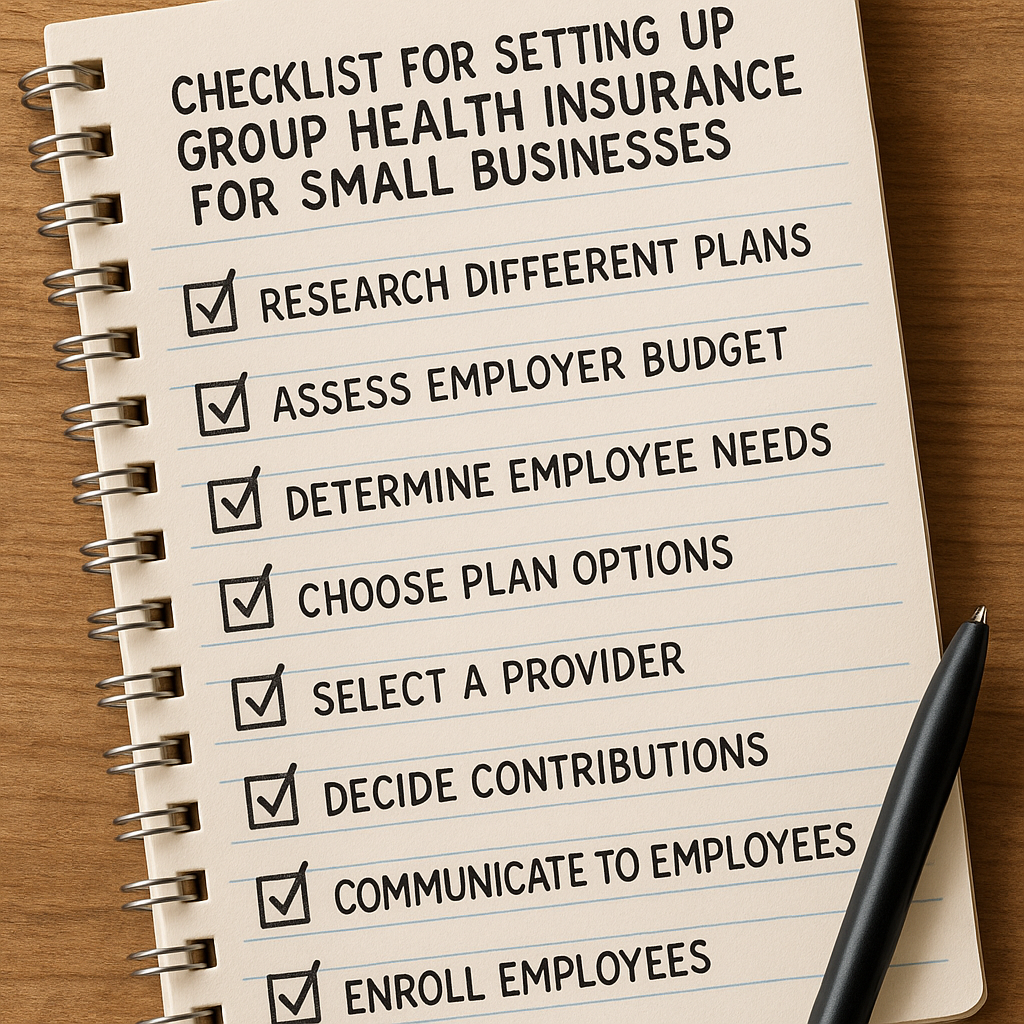
Now comes the fun (or the dreaded) part: requesting quotes. Here’s a quick checklist to keep the process tidy:
- Identify 2–3 carriers that specialize in small‑group or nonprofit markets.
- Ask each for a fully‑insured quote, a level‑funded quote, and an ICHRA allowance estimate.
- Request details on any wellness programs, telehealth options, or mental‑health add‑ons – those can be the differentiator for staff morale.
When the numbers land in your inbox, plug them into the cost‑benefit matrix you built in Step 1. Score each option on three criteria: total cost to the organization, flexibility for employees, and ease of administration.
Check eligibility and compliance
Before you sign anything, double‑check two regulatory boxes:
- Is the plan “qualified” under IRS rules for nonprofit employers? Most fully‑insured group plans and HRAs meet the criteria, but the fine print can vary by state.
- Do you meet the minimum participation rules for an ICHRA or QSEHRA? Typically you need to offer the arrangement to all full‑time employees, and you can’t discriminate based on health status.
A quick call to your broker or a glance at the plan’s Summary of Benefits can save you a costly compliance surprise later.
Make a decision and document it
Once the matrix is filled out, pick the highest‑scoring option. Write a one‑page summary that includes:
- The chosen plan type (e.g., ICHRA with $300/month allowance).
- Why it won’t break your budget.
- How it addresses the top employee pain points you uncovered in Step 1.
Store that summary with your benefits policy file – you’ll reference it when you renew next year.
Ready to move forward? Grab the next set of quotes, run the matrix, and you’ll have a qualified group health plan that actually supports your mission.
Step 3: Compare Plan Features and Costs
Alright, you’ve gathered a handful of quotes and you’ve got your cost‑benefit matrix from Step 1. Now it’s time to roll up your sleeves and actually compare what you’re getting for each dollar. Think of it like a blind date: you want to know not just the price tag, but whether the personality matches what your team needs.
Lay out the comparison grid
Grab a fresh sheet of paper (or a new tab in your spreadsheet) and create three columns: Feature Set, Cost to Your Nonprofit, and Admin Effort. Fill in rows for every option you’ve collected – a fully‑insured PPO, an ICHRA allowance, a level‑funded plan, maybe an Association Health Plan if your state offers one.
Here’s a quick example to get you started:
| Plan Type | Key Features | Annual Cost (Org.) | Admin Load |
|---|---|---|---|
| Fully‑Insured PPO | Nationwide network, covered preventive care, 20% coinsurance | $12,000 | Low – carrier handles claims |
| ICHRA ($300/mo per employee) | Tax‑free reimbursement, employee picks marketplace plan, flexible tiering | $10,800 | Medium – payroll & reimbursement tracking |
| Association Health Plan (AHP) | Group buying power, optional dental/vision, limited network | $9,500 | Medium – broker‑managed enrollment |
Notice how the AHP looks cheap but also has a “limited network” note. That’s the kind of nuance you want to surface before you pick a winner.
Score the soft stuff
Numbers tell part of the story, but your staff will care about things like mental‑health coverage, telehealth access, and whether a plan lets a single parent add a dependent without a huge surcharge. Add a fourth column called Employee Fit and give each option a score from 1‑5 based on how well it meets the top pain points you uncovered in Step 1.
For example, if mental‑health benefits were a recurring theme, the ICHRA might score a 4 because employees can choose a marketplace plan that includes robust therapy coverage. The fully‑insured PPO might only get a 2 if its mental‑health copay is high.
Run the numbers – a quick checklist
- Calculate total annual cost to the organization (premiums + employer contributions).
- Estimate average employee out‑of‑pocket spend for each option (deductibles, copays).
- Factor in administrative time – how many hours per month will you spend on enrollment, reimbursements, or broker coordination?
- Assign a weight to each category based on your nonprofit’s priorities (e.g., cost 40%, employee fit 35%, admin load 25%).
- Multiply scores by weights and add them up. The highest total wins.
That might sound like a lot of math, but you can do it in a single spreadsheet column. When the numbers line up, you’ll see a clear front‑runner.
Real‑world example: a 30‑person arts nonprofit
Imagine a small arts nonprofit with 30 staff members. Their top concerns are: high deductible plans, no mental‑health coverage, and a desire for flexibility because many employees are freelancers who already have ACA plans.
They compare three options:
- Traditional PPO – $14,400/year, 20% coinsurance, limited mental‑health benefits.
- ICHRA with $250/month allowance – $9,000/year, employees pick their own marketplace plans, unlimited mental‑health options.
- Association Health Plan – $10,200/year, limited provider network, modest mental‑health coverage.
After scoring, the ICHRA wins with a combined weighted score of 86, versus 71 for the AHP and 65 for the PPO. The nonprofit saves $5,400 annually and gives staff the freedom to choose plans that actually fit their lives.
Expert tip: ask your broker for a side‑by‑side feature sheet
Most carriers will hand you a one‑page “benefit comparison” that highlights things like wellness programs, telehealth availability, and prescription drug tiers. Request that sheet for every quote and paste the key bullets into your table – it makes the decision process feel less like guesswork.
And don’t forget to double‑check compliance: whichever option you pick must be a qualified plan under IRS rules, and you must meet the participation requirements for HRAs. A quick call to your broker can confirm you’re on solid ground.
Next step: lock in the winner
Once your weighted score points to a clear champion, draft a one‑page decision memo (you already know how to do that from Step 2). Include the table you just built, the total cost, and a brief note on why it solves the employee pain points you heard about.
Store that memo with your benefits policy file, share it with senior leadership, and start the enrollment timeline. You’ll feel a lot less anxious knowing you’ve compared features, costs, and admin load side by side – and you’ve got the data to defend the choice if anyone asks.
Ready to move forward? Pull those quotes, fill out the table, run the weighted scores, and you’ll have a clear, budget‑friendly path to group health insurance for nonprofits that actually works for your mission.
Step 4: Navigate Legal Requirements and Compliance
Now that you’ve narrowed down the plan type, the next hurdle is making sure every box is checked so the IRS and state regulators won’t raise an eyebrow later.
According to research, roughly half of U.S. companies provide health insurance, and 47% of nonprofits with fewer than 50 employees already offer it.
Confirm the plan is a “qualified” group plan
For a nonprofit, a qualified plan means it meets the Affordable Care Act’s definition and the IRS’s “qualified” status for employer‑sponsored coverage. In practice, that usually translates to a fully‑insured group policy or an HRA that follows the rules outlined in the ACA’s SHOP marketplace.
If you’re leaning toward an ICHRA or QSEHRA, double‑check that you’re offering the allowance to all full‑time staff and that you’re not discriminating based on health status. The Department of Labor requires written notice to employees and a clear, annual “integrated” plan document.
Watch the participation thresholds
Nonprofits with 50 or fewer employees can often use the Small Business Health Options Program (SHOP) without triggering the employer shared responsibility penalty. But the ACA still expects you to offer minimum essential coverage to at least 95% of full‑time workers, or you’ll face the employer shared responsibility payment.
A quick tip: run a simple spreadsheet that lists each employee’s status (full‑time, part‑time, seasonal) and marks whether they’ll receive the benefit. If you fall short, you can either broaden the offering or adjust the allowance until you meet the 95% threshold.
State‑specific rules you can’t ignore
Some states have their own “mini‑ACA” rules that impose additional reporting or benefit‑design requirements. For example, California and Massachusetts require annual benefit statements that spell out employee contributions, deductible amounts, and out‑of‑pocket maximums.
When you’re unsure, a brief call with your carrier’s compliance officer usually clears up the local quirks. They can also provide the template language you need for the employee notice.
Tax‑credit opportunities
If you have 25 or fewer full‑time staff and you purchase a SHOP plan, you may qualify for the Small Business Health Care Tax Credit – up to 35% of the employer‑paid portion of premiums for tax‑exempt nonprofits. The credit is claimed on your annual federal return, and you’ll need the Form 8945 proof of eligibility.
Don’t forget to keep every receipt, the Summary of Benefits, and the written HRA plan document for at least three years. The IRS can request them during an audit, and having a tidy folder will save you a lot of stress.
Checklist before you sign
- Verify the plan is “qualified” under IRS and ACA definitions.
- Ensure 95% participation for full‑time employees (or document the exemption).
- Confirm state‑level reporting requirements and collect the required notice templates.
- Calculate potential tax credits and gather the necessary forms.
- Archive the plan document, employee notices, and premium invoices for three years.
Feeling a bit overwhelmed? That’s normal. The compliance maze feels endless until you break it down step by step. The good news is that once the paperwork is in place, you’ll have a solid legal foundation that protects both your nonprofit and your staff.
Here’s a quick way to stay on track: set a calendar reminder for the annual renewal deadline, and schedule a 30‑minute call with your broker a month before that date. Use that time to verify that nothing changed in the federal or state rules.
By following this roadmap, you’ll turn what feels like a regulatory obstacle into a smooth, repeatable process—so you can focus on what really matters: keeping your mission‑driven team healthy and happy.
Step 5: Implement and Communicate the Plan to Your Team
Okay, you’ve picked the right group health insurance for nonprofits, crunched the numbers, and signed the paperwork. Now comes the part that feels a bit like stage‑craft: rolling it out so your staff actually understands, trusts, and uses the benefit.
Map out a rollout timeline
Start with a simple calendar. Mark the enrollment open date, the deadline, and a few reminder checkpoints – maybe a week after launch, then three days before the cut‑off. Keeping those dates in a shared Google calendar or your project‑management tool gives everyone a visual cue and reduces last‑minute scramble.
Tip: set an automatic email reminder the day the enrollment window opens. A short “It’s go time! Here’s how to log in” note is all you need.
Create a one‑page cheat sheet
People love bite‑size info. Draft a one‑page PDF that answers the three questions most staff ask: “What’s covered?”, “How much do I pay?”, and “How do I enroll?” Use plain language – no legalese. Include screenshots of the portal login, a quick FAQ, and a contact phone number (your broker’s line works great).
Print a few copies for the break‑room and upload the file to your intranet. If you’ve got a Slack or Teams channel, pin the file there too.
Host a live walk‑through
Schedule a 20‑minute Zoom or in‑person session. Walk through the enrollment steps live, share your screen, and pause for questions. It feels more personal than a static email, and you can see the confusion in real time.
Even better – invite a broker rep to join. They can field technical questions about plan tiers, explain how to add a dependent, and reassure folks about tax‑free reimbursements.
Use multiple communication channels
Don’t rely on email alone. Post a short video teaser on your internal newsletter, drop a reminder in the staff chat, and put a flyer on the office bulletin board. Vary the tone: a friendly “Hey team, health benefits are live!” works just as well as a more formal “Please review your enrollment options by X date.”
And remember to repeat the message. The first email gets 30 % attention, the second 50 %, the third 70 % – people need nudges.
Address common concerns up front
Some staff worry about “affordability” or “paperwork overload.” Anticipate those thoughts: explain that the organization is covering X % of premiums, that the enrollment portal auto‑populates personal info, and that they can change elections during the open window without penalty.
Include a short story: “When we launched last year, Maya was nervous about adding her newborn. With the new ICHRA, she chose a plan that covered pediatric visits and paid nothing out of pocket.” Real anecdotes make the benefit feel tangible.
Set up a help desk for the enrollment period
Designate one person – maybe your HR coordinator or a savvy volunteer – as the go‑to for enrollment questions. Give them a cheat sheet of login steps, common error messages, and escalation contacts (broker, carrier). A dedicated help desk reduces bottlenecks and shows you care about a smooth experience.
If you have a large team, consider a “clinic hour” where staff can drop in (virtually or physically) for a quick 5‑minute check‑in.
Collect feedback and close the loop
Once enrollment closes, send a short survey: “What worked? What confused you?” Use the answers to tweak next year’s rollout. Even a one‑question poll (“Did you feel the communication was clear?”) signals that you’re listening.
Celebrate the win. A quick “Thanks for enrolling! Here’s what’s next” note reinforces that the benefit is active and appreciated.
Keep documentation alive
Store the cheat sheet, enrollment timeline, and FAQ in a permanent folder on your shared drive. When the next renewal comes around, you’ll have a ready‑made starter kit – no reinventing the wheel.
Finally, remember that implementation is a habit, not a one‑off event. By treating the rollout like a conversation rather than a memo, you turn “group health insurance for nonprofits” from a legal requirement into a team‑building advantage.
FAQ
What exactly is “group health insurance for nonprofits” and how does it differ from a regular group plan?
At its core, group health insurance for nonprofits is the same legal product you’d buy for any employer – a pool of coverage that spreads risk across all participants. The big difference is that nonprofits often qualify for special pricing, tax‑exempt status, and sometimes state‑run subsidies that aren’t available to for‑profit firms. In practice that means lower premiums, more flexible contribution options, and paperwork that’s tuned to mission‑driven budgets.
Can a small nonprofit with ten employees still get competitive rates, or do you need a larger staff to make it work?
Absolutely, you don’t need a massive headcount to unlock good rates. Carriers look at the total payroll, not just the number of faces, and many offer “small‑group” tiers that start at as few as three employees. Because your organization is tax‑exempt, you may also qualify for the Small Business Health Care Tax Credit if you meet the eligibility thresholds. The result is a plan that feels like it was built for a Fortune‑500, but costs what a small team can afford.
How do I choose between a traditional fully‑insured plan and an Individual Coverage HRA (ICHRA) for my nonprofit?
Think of it like picking a coffee order: a fully‑insured plan is a ready‑made latte – you pay a set premium and the carrier handles claims. An ICHRA is more like a brew‑your‑own, where you set a monthly allowance and employees pick the individual policy that fits their life. If you value predictability and want the carrier to do the heavy lifting, go fully‑insured. If you want flexibility, tax‑free reimbursements, and the ability to tailor benefits to a diverse staff, an ICHRA can be a better fit.
What tax benefits does a tax‑exempt nonprofit actually receive by offering group health insurance?
First off, the employer’s contribution to employee premiums is generally tax‑deductible as a charitable expense. On top of that, contributions made through an HRA or ICHRA are excluded from employees’ taxable income, which means everyone walks away with more take‑home pay. And if you qualify for the Small Business Health Care Tax Credit, the IRS will reimburse up to 35 % of the employer‑paid portion, further stretching every dollar.
What practical steps can I take to make enrollment smooth and avoid staff confusion?
Start with a one‑page cheat sheet that answers “what’s covered,” “how much you pay,” and “how to enroll.” Host a short live walkthrough – 15 minutes on Zoom is enough to show the portal, answer real‑time questions, and demonstrate adding a dependent. Designate a go‑to person with a FAQ script, and send gentle reminder emails a week, three days, and the day before the deadline. Those tiny nudges keep the process painless.
How often should I revisit my nonprofit’s health‑benefit strategy, and what should I be looking for?
Make it an annual habit, ideally a month before the open enrollment window. Pull the latest premium quotes, compare them against your budget, and run a quick staff pulse survey to see if any new concerns have emerged – maybe telehealth became a priority or a new family‑friendly rider is needed. Check whether you still qualify for any tax credits, and verify that state‑specific reporting requirements haven’t changed. A short checklist keeps you proactive instead of reactive.
Conclusion
We’ve walked through everything from sizing up your team’s needs to picking a qualified plan and getting everyone onboard. If you’re still wondering whether “group health insurance for nonprofits” is worth the effort, think about the last time you saw a staff member stay late because they were worried about a medical bill. That anxiety disappears when you have a solid benefit in place.
Remember, the process isn’t a one‑off sprint. Treat your benefit strategy like a garden: plant the seeds with a clear budget, water it with annual check‑ins, and prune the plan when premiums shift or new employee concerns surface.
So, what’s the next move? Grab that spreadsheet you built in Step 1, plug in the latest quotes, and pick the option that balances cost, flexibility, and the pain points your team shared. Then schedule a quick rollout meeting – a 15‑minute Zoom call and a one‑page cheat sheet go a long way.
And here’s a gentle nudge: reach out to Life Care Benefit Services for a personalized quote. Our team can walk you through the numbers, answer compliance questions, and help you claim any tax credits you qualify for.
Bottom line: offering group health insurance for nonprofits isn’t a luxury; it’s a practical tool that protects your mission, boosts morale, and keeps talent where it belongs – with you.