

How to Claim Living Benefits on IUL Policy – Step‑by‑Step Guide
When a serious illness hits, many policyholders are shocked to learn that filing a living‑benefit claim on their Indexed Universal Life (IUL) policy isn’t as clear as it should be. In fact, most insurers keep the claim steps hidden. This guide walks you through every move you need to make, from checking eligibility to keeping your policy strong after you get paid. By the end you’ll know exactly what paperwork to gather, how to fill out the form, and what tax rules apply.
Let’s dive in and give you a roadmap you can follow the moment you need that cash.
Step 1: Review Your IUL Policy for Living Benefits Eligibility
The first thing you do is pull out the policy document you received when you signed up. Look for the words “accelerated death benefit,” “critical illness rider,” or “chronic illness advance.” Those phrases are the breadcrumbs that tell you a living‑benefit payout is possible.
Most IUL riders kick in when you’re diagnosed with a covered condition, need long‑term care, or face a terminal illness with a life expectancy of 12 months or less. Check the rider’s table for the exact trigger events. Some policies require a 30 % loss of function in a listed activity; others use broader language like “substantially limits daily activities.” Knowing the exact trigger saves you back‑and‑forth with the insurer later.
Benefit limits vary. A common structure lets you draw 10 % to 25 % of the face amount. For a $500,000 policy with a 20 % rider, you could access up to $100,000. Keep in mind that any amount you receive reduces the death benefit for your beneficiaries.
Exclusions and waiting periods matter too. Many riders impose a 12‑month waiting period from the policy start date and may exclude pre‑existing conditions. Spot lines that say “does not cover conditions diagnosed within the first 24 months” and note them.
Most carriers let you view rider details in an online portal. Log in, handle to the “Policy Documents” or “Riders” section, and compare the digital copy with the paper version. If anything looks off, call the carrier now, better to ask questions early than scramble later.
Here’s a fast test: multiply the policy’s face amount by the rider’s percentage and compare that to the cash value you’ve built. If the potential payout exceeds your cash value, the rider is likely usable; otherwise you may need to rely on the cash value itself.
Bottom line:Confirm the rider’s presence, trigger events, limits, and exclusions before you start the claim.
Step 2: Gather Required Medical and Financial Documentation
Now that you know you’re eligible, it’s time to collect the paperwork that will actually move the money. Think of it like packing a suitcase: you don’t want to forget the charger, the snacks, or the GPS. Missing a single doc can stall the claim and add stress when you need cash fast.
Start with the official claim form. Insurers usually tuck it inside the rider booklet or make it downloadable in the online portal. Fill it out completely, leave no question blank, even if the answer is “N/A.” A partially completed form is the fastest way to get sent back for revisions.
Next, get a physician’s statement. The insurer will want a note that confirms the diagnosis, the expected prognosis, and how the condition impacts daily living. Ask your doctor to use the exact language the rider lists, such as “30 % loss of function in a listed activity” or “terminal diagnosis with life expectancy of 12 months or less.” Request a signed and dated copy for your records.
If you’re claiming for qualified medical expenses, gather receipts, hospital statements, and pharmacy invoices that show the amount you’re trying to cover. Even if the rider allows “any purpose,” having itemized proof helps the adjuster see you’re serious.
Pull the specific pages from your IUL contract that describe the living‑benefit rider, trigger events, benefit limits, and required documentation. Highlight those sections and attach the excerpts to your claim package. If you can’t locate the original booklet, log into the carrier’s portal and download the PDF. Most insurers keep a searchable version, which saves you from digging through a dusty file cabinet.
Additional supporting docs may include a recent annual statement showing cash value, proof of identity (driver’s license or passport), and a signed power‑of‑attorney if you’re filing on behalf of a spouse or parent. Having everything ready prevents back‑and‑forth emails that can delay the payout by weeks.
Bottom line:Assemble a complete, organized packet, claim form, doctor’s note, rider excerpts, expense receipts, cash‑value statement, and ID, to avoid delays.

Step 3: Complete the Living Benefits Claim Form
With your paperwork in hand, it’s time to fill out the claim form itself. The form usually asks for basic policy info, the qualifying condition, and the amount you’re requesting. Write clearly and legibly; if you’re typing, use a standard font and avoid special characters.
Here’s a quick walkthrough:
- Enter your policy number, full name, and contact details exactly as they appear on the policy.
- Specify the rider you’re invoking (e.g., critical‑illness rider) and copy the trigger language from the policy.
- Attach the physician’s statement and any required receipts.
- Indicate your preferred payout method, lump‑sum, installments, or a policy loan.
- Sign and date the form. If you’re using a power‑of‑attorney, include their signature as well.
Double‑check every field before you move on. A single typo in the policy number can send your packet to the wrong department and add days to the timeline.
Once the form is complete, save a copy for your records. Many carriers let you upload the PDF directly through a secure claims portal. If you prefer email, use the address listed in the rider booklet and confirm you have the correct one.
Bottom line:Accurate, thorough completion of the claim form is the single most important step to avoid processing delays.
“A clean, fully‑filled claim form cuts the insurer’s review time in half.”
Step 4: Submit Claim and Follow Up
Now you’re ready to send the packet. Most carriers give you two options: a secure email address or an online claims portal. If you’ve already set up portal access, that’s usually the cleanest route, just drag‑and‑drop the PDF and click “Submit.”
If you use email, double‑check the address in the policy booklet. A typo can send your whole packet to the wrong department and add days to the timeline. Include a brief cover note that states the policy number, the rider you’re invoking, and a list of attached documents.
After you submit, the insurer should send an automated receipt within 24‑48 hours. If you don’t see it, give them a quick call. A short “Hello, just checking that my claim arrived” can surface hidden glitches before they become a problem.
Mark the expected decision date on your calendar. Claims can take anywhere from a week to a month, depending on the carrier’s workload. Schedule a reminder to call if you haven’t heard back by the target date.
When the insurer requests additional info, respond ASAP. The faster you feed them what they need, the sooner the money lands in your account.
Bottom line:Submit through the portal or verified email, get a receipt, and set a follow‑up schedule to keep the process moving.
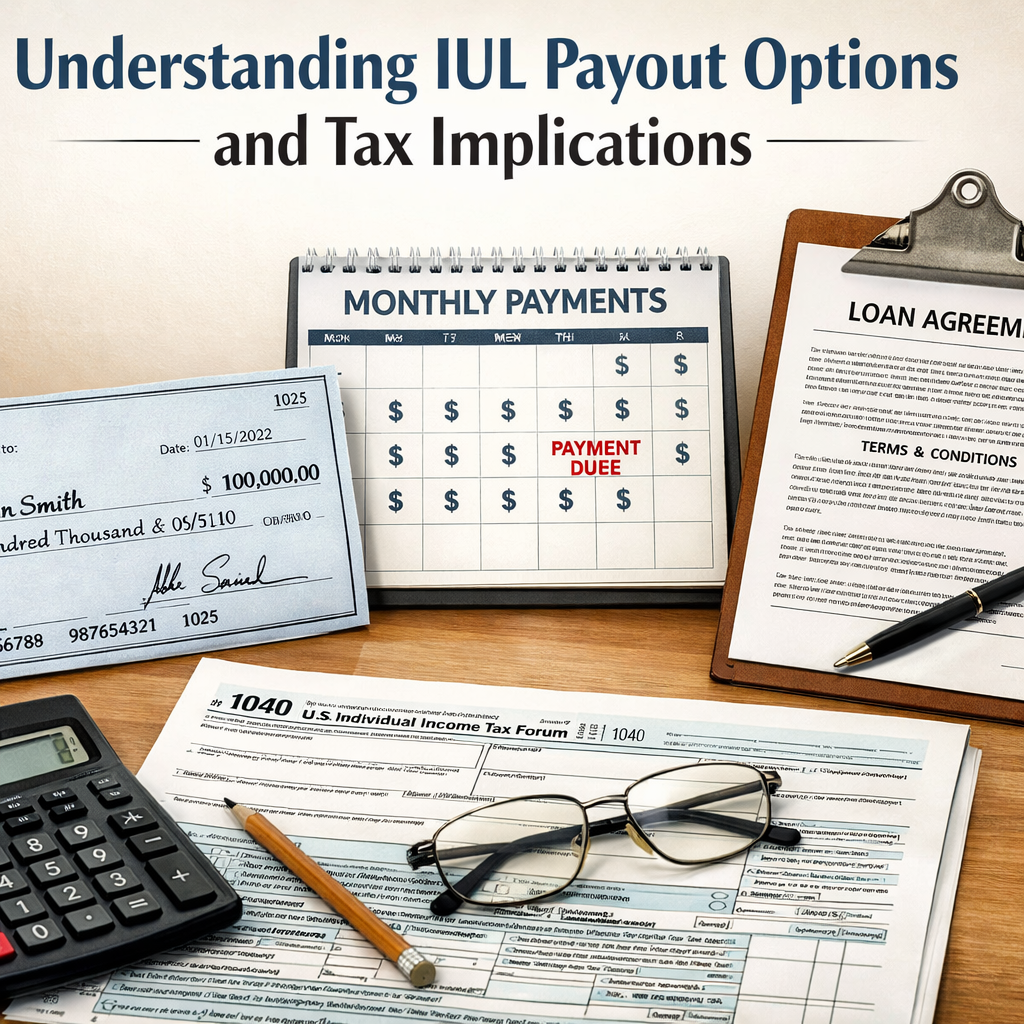
Step 5: Understand Benefit Payout Options and Tax Implications
Once the claim is approved, you’ll have three main ways to receive the money:
- Lump‑sum payment:The insurer sends a single check or wires the full amount to your bank.
- Structured installments:Equal payments over a set period, useful for steady cash flow.
- Policy loan or withdrawal:You tap the cash value directly. Loans are tax‑free as long as the policy stays in force; withdrawals up to your basis are also tax‑free.
The tax treatment depends on how you take the money. A true “living‑benefit” advance is generally tax‑free if used for qualified medical expenses, according to the IRS. If you use the cash for non‑medical purposes, the amount may be taxable as ordinary income.
Policy loans don’t count as income, but they reduce the death benefit and accrue interest inside the policy. If the loan balance grows too large, generally above 80 % of the cash value, the policy could become a Modified Endowment Contract (MEC) and trigger taxable income on withdrawals.
To avoid surprises, run a simple scenario:
- Take the approved payout amount.
- Decide on lump‑sum vs. installments vs. loan.
- Check the policy’s cash‑value statement to see how a loan would affect the death benefit.
- Consult a tax professional to confirm whether your chosen method stays tax‑free.
Bottom line:Choose the payout method that aligns with your cash‑flow needs while keeping the tax impact minimal.
Step 6: Coordinate with Your Employer or Mortgage Lender (if applicable)
Many policyholders use living benefits to cover a mortgage payment, a business loan, or a payroll gap. If that’s you, loop in the relevant party early.
For a mortgage, provide the lender with a copy of the claim approval and the payout schedule. Most lenders will accept a lump‑sum payment to reduce the principal or will allow you to set up a temporary payment plan using the installment option.
If you run a small business, you may need to show the claim approval to your accountant so they can record the influx correctly and adjust cash‑flow forecasts. Some employers offer a “hardship” advance program that can be combined with the IUL payout to keep payroll steady.
Don’t forget to update any automatic debit instructions tied to the policy’s premium payments. If you’re using the cash‑value to cover premiums, make sure the lender or payroll system knows the new source of funds.
Bottom line:Communicate the approved payout to any creditor or employer promptly to keep your financial obligations on track.
Step 7: Maintain Policy Health After Claim
After you’ve taken a living‑benefit advance, the policy is still alive, but the numbers have changed. The death benefit is lower, the cash value may have decreased, and any loan balance is now part of the policy’s debt.
Regularly review the policy’s annual statement. Look for three key metrics:
- Cash‑value vs. cost of insurance (COI):Make sure the cash value still covers the COI; otherwise the policy could lapse.
- Loan‑to‑basis ratio:Keep loans under 30 % of the total premiums you’ve paid to stay in the tax‑free zone.
- Death‑benefit impact:Know exactly how much less your beneficiaries will receive.
If the cash value is shrinking, you may need to increase premium payments temporarily or add a small lump‑sum contribution to keep the policy from lapsing. Many carriers allow premium flexibility, raise or lower payments as your income changes.
Also watch for a Modified Endowment Contract (MEC) status. If you’ve taken too much cash out relative to the premiums paid, the policy may become a MEC, and future withdrawals could be taxed as ordinary income.
Finally, keep your agent in the loop. A good agent can run updated illustrations, suggest premium adjustments, and help you plan for any future claims.
Bottom line:Monitor cash value, loan ratios, and COI regularly to keep the policy strong and avoid unwanted tax consequences.
“Living benefits are a safety valve, not a free lunch. Ongoing management is essential.”
Frequently Asked Questions
What documents do I need to start a living‑benefits claim?
You’ll need the official claim form from your insurer, a physician’s statement that matches the rider’s trigger language, copies of any qualified expense receipts, the rider excerpt pages from your policy, a recent cash‑value statement, and proof of identity. Having a power‑of‑attorney on hand is also wise if you’re filing for someone else. Putting all these together in a single PDF package speeds up the review.
How long does the claim process usually take?
Processing times vary by carrier, but most insurers aim for a decision within 2‑4 weeks after receiving a complete packet. If any document is missing or unclear, they’ll request clarification, which can add another week or two. Setting a follow‑up reminder for the expected decision date helps you stay on track.
Can I claim living benefits if I already have a chronic condition?
Yes, if the rider’s definition covers your condition. Some policies exclude pre‑existing conditions diagnosed within the first 12‑24 months of the policy. Review the rider’s exclusion list carefully; if your condition falls within an excluded window, you may need to wait until the waiting period expires before filing.
What happens to my death benefit after I take a living‑benefit advance?
The amount you receive reduces the death benefit dollar‑for‑dollar. For example, a $500,000 policy with a $100,000 living‑benefit payout will leave a $400,000 death benefit for your beneficiaries, minus any administrative fees. The policy stays in force, so the remaining benefit still protects your loved ones.
Are living‑benefit payouts taxable?
Generally, living‑benefit advances are tax‑free if used for qualified medical expenses, as outlined by the IRS. If you use the money for non‑medical purposes, the portion that exceeds your basis may be taxed as ordinary income. Policy loans remain tax‑free as long as the policy stays active and you don’t exceed the loan‑to‑basis threshold.
Do I need a new medical exam to file a claim?
Usually not. Because the insurer already has your health information from the original underwriting, they typically only require a physician’s statement confirming the diagnosis and how it meets the rider’s trigger criteria. However, some carriers may ask for a brief exam if the condition is complex or if the original medical data is old.
How often should I review my IUL after taking a living‑benefit payout?
At least once a year, or after any major life change (job loss, retirement, significant health event). During the review, check the cash‑value versus COI, the loan‑to‑basis ratio, and the updated death benefit. Adjust premiums or make additional contributions if the cash value is slipping below the cost of insurance.
Can I add a living‑benefit rider after I’ve bought the policy?
Yes, many carriers allow you to add riders during the first few years of the policy, though the cost may be higher than if you added it at inception. Adding a rider later can also trigger a new waiting period, so plan accordingly.
Conclusion & Next Steps
Getting a living‑benefit payout from an IUL policy doesn’t have to be a mystery. By confirming eligibility, gathering the right documents, completing the claim form accurately, and staying on top of follow‑up, you can turn a stressful health event into a source of financial relief.
Remember to choose a payout option that matches your cash‑flow needs, keep an eye on tax implications, and maintain the policy’s health afterward. A quick annual review with your agent can prevent unwanted lapses and ensure the policy continues to serve both your present and future goals.
If you’re ready to take the next step, schedule a consultation with Life Care Benefit Services. Their agents can walk you through the paperwork, explain rider details, and help you model different payout scenarios.
Take control of your coverage today, don’t wait until a crisis hits to discover what your policy can really do.